I don't have a pattern to show you, I just see examples I like and sort of plan it out in my head and as I go. Here is what I did:
I started by cutting out the main fabric in on big rectangle. Then I cut out where the pockets would be.
I gathered, or rouched, the center of the apron to give it more body and make it more feminine. Wait that's silly! What's more feminine than an apron right?! I sewed along the top where pinned to keep the shape.
I cut whole rectangles to form the inside of the pockets. I simply sewed them on in a deep curve all the way to the bottom seam. This makes a nice deep pocket for wooden spoons... Sarah, this will come in handy later when you need to swat your chillens.
I had to un-pin the polka dot pocket lining shown above in order to do the piping on the pockets. The piping needs to be done first because it would be hard to sew it on with the pockets already on. I took the green fabric that I got for the piping, and piped along the edges of the pocket openings. I like to just iron it down the middle (well I never like to iron, but I do it for this because it's easier)...
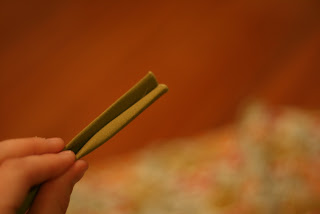
then fold the edges to the middle and iron again. Now it will stay seamed while I pin and sew.
I pin the piping to the pocket openings and sew on! Like stated above, I did not sew it with the polka dot fabric already in place. I had to un-pin and then sew. I just forgot to take pictures in the right order!
Piping sewn on.
Next, I re-pinned the polka dot pocket backing onto the main fabric. I sewed the pocket backing on and formed the deep pocket in one big curve.
The pockets are now complete!
Next, I decided to gather the center of the apron even more because the pockets were a bit too far to the side. And Sarah is quite thin, so if they were too near my rear on me, they would have been back pockets on her! I re-pinned the already rouched center, and sewed over the original. This also adds extra strength to the front of the apron.
This time I also gathered the pockets to make the opening not so flat... this way the pocket sort of hangs open. I only did about three sections, so not as tight as the rest of the front of the apron.
Almost done! Here I am just adding a small rectangular section of the main floral fabric to the outer edges of the apron. That way the pocket is not the end of the apron and it sort of wraps around whoever is wearing it. I also show below another section of piping being added to the outer edges. This seams the edges and gives a nice finished look.
Now for the tie. I took the polka dot fabric and cut two 6 inch wide strips the whole length of the hard. I cut one of the strips in half and sewed it to the outer edges of the other strip, to make one long 6 inch wide strip. This way the seam is not right in the middle of the apron and it looks like one single piece.
I then ironed... again... down the middle of the strip for guidance and ironed the edges of the long strip toward the center to keep everything in place while I pin and sew. I did not fold the edges all the way to the center this time because I wanted the tie to be a little thicker. But I folded them in enough to make sure it would be strong and not fray with a lot of use. Below is a pic if the ironed edges.
Now it is time to pin and attach to the top of the apron. I place the top of the apron inside the open part of the tie and pin together. The tie essentially envelopes the top of the apron. This will seam and attach at the same time. The pic below is upside down... sorry!
Sew along top of apron to attach.
The tie is attached and the top is finished! Now just do the same thing to the bottom, but measure the length you will need to go just to the edges of the apron. This seams the bottom and adds a nice finished look to the apron at the same time. Since I gathered so much of the apron at the top, I had to stretch out the bottom and sew along a bit of a curve for the bottom polka dot seam.
Finished product! I'm pretty proud of it :)
Please disregard the paint smudge on my shorts...
I am also equally proud of the apron I made my dear friend Rachel Outlaw-Rothberg last year! The little blue flowers are my favorite!


No comments:
Post a Comment